|
On the first page of this article, we looked at some original flintlock muzzleloaders that had been converted to the new-fangled caplock or percussion system. On this page, we will document the steps that are taken in order convert Bill's Ketland Trade Pistol that began life as a flintlock into a more modern 19th century style caplock.
While we have the advantages of powder tools, arc welders, and modern steel taps and drill bits, keep in mind that the gunsmiths who did these conversions in the 19th century did all of this work using charcoal forges and hand cranked drills.
And now on to the steps in converting Bill's Ketland Trade pistol to a caplock:
| |
|
|
|
|
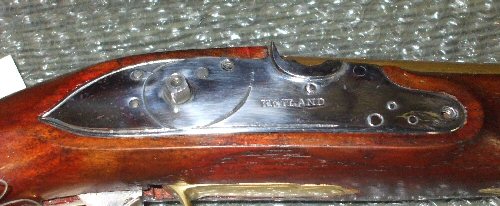
Here is Bill's Ketland pistol with the cock, frizzen and spring removed, holes plugged and pan cut away. We chose to leave the stump of the pan there instead of bringing the surface flush with the lockplate. This will more closely replicate an old original conversion and give some extra support to the drum.
|
|
| |
|
|
|
|
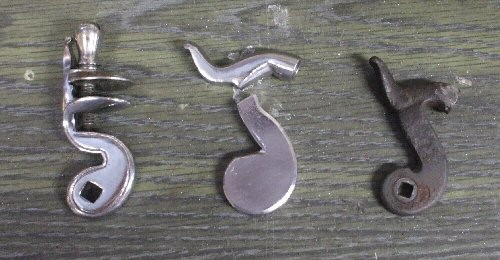
On the left is the cock that came off of Bill's Ketland pistol, on the right is the hammer from the original lock shown above, and in the middle is the parts to the hammer that is being fabricated.
|
|
| |
|
|
|
|
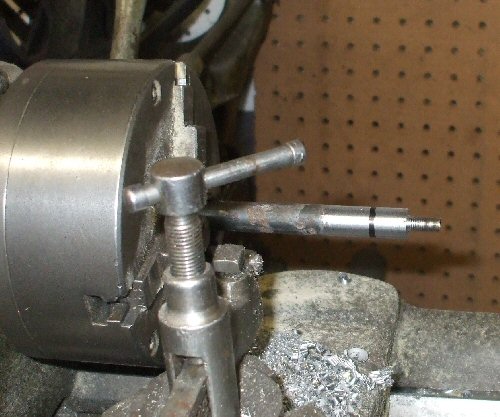
Here you can see the drum chucked in the lathe, beginning to take shape. It has been turned down from round stock, the stem portion that will screw into the barrel wall has been turned to shape and cut with 1/4-28 threads. It seems like everything that goes on around here is historic in some way. Even the lathe is a WW2 vintage South Bend that is a historic artifact in it's own right!
|
|
| |
|
|
|
|
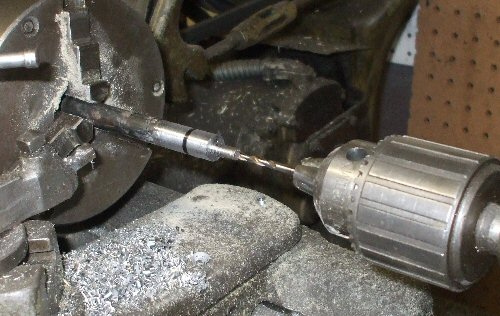
Here you can see the drum, still attached to the piece of round stock it is being made out of, being drilled with a flash hole that will carry the spark from the bottom of the nipple to the chamber area of the barrel.
|
|
| |
|
|
|
|
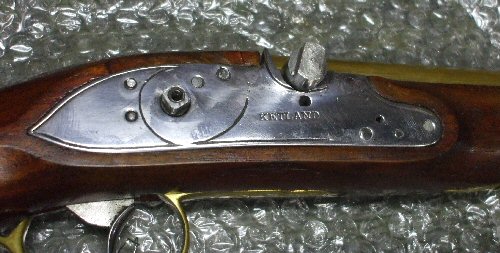
The barrel's vent hole is drilled and tapped to 1/4-28, and the drum is installed. The lockplate and pan area has been filed to fit the drum. The pan of this lock was pretty big, so there is a little extra space on the sides. The bottom of the drum rests on the top of the lockplate, however, and this should give it some extra support.
|
|
| |
|
|
|
|
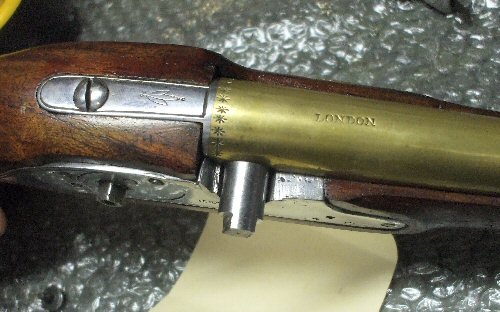
Here is the drum as seen from above. Notice that there is a raised lug with two flats that are meant to be gripped with a wrench to tighten it when installing. This extra metal gets filed away later. On many original converted flintlocks, you can still see the remains of this lug. Perhaps it is because we have access to more modern machine tools, but this drum fits the barrel much more closely than most originals.
|
|
| |
|
|
|
|
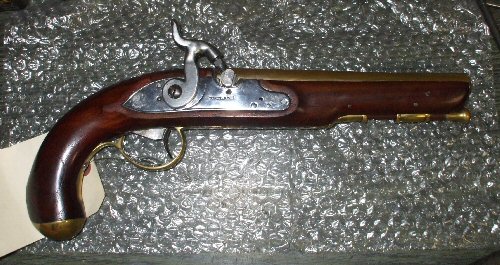
The fabricated hammer had a hole drilled in it that was located by observing where the tumbler shaft contacts it. Of course a tumbler shaft is square and the drilled hole in the hammer is round, so the hole needs to be filed to fit. Here you can see the state of the project at the end of the day. All that is left to do is to install the nipple and file off the installation lug on the end of the drum to give it a finished appearance.
|
|
|


