|
After getting a few calls and emails from folks asking how to fit their bayonet to their musket, we decided to create a photo tutorial showing you how to do it. Historically, Brown Bess type bayonets were individually fitted to the muskets at the armory level, then numbered to them. Today people are used to 21st century precision and expect a bayonet that fits and Italian Short Land to also fit an East India Pattern, a Japanese Short Land or an Indian Long Land. Life just isn't that simple as all of the above mentioned guns were made using different gauges and the barrels have a different outside diameter.
The photos below show Jeff going through the steps to fit a bayonet to a Ranger Carbine. To fit the bayonet, you will need a flat (or half round) file, and a small square or triangular one. If you happen to have a Dremel tool or something similar, you are well ahead of the game as it is much faster, just be careful not to take off too much metal with it.
Click on the photos below to see a larger image. Use your browser's "back" button to return.
| |
|
|
|
|
First step is to sight in your musket if you plan to shoot it with ball. The bayonet lug is also the front sight, so get the lug to the height you want it before fitting the bayonet to it. I'll explain "sighting in" in a different tutorial. In this photo, you can see that the bayonet will not go over the bayonet lug as-is. |
|
| |
|
|
|
|
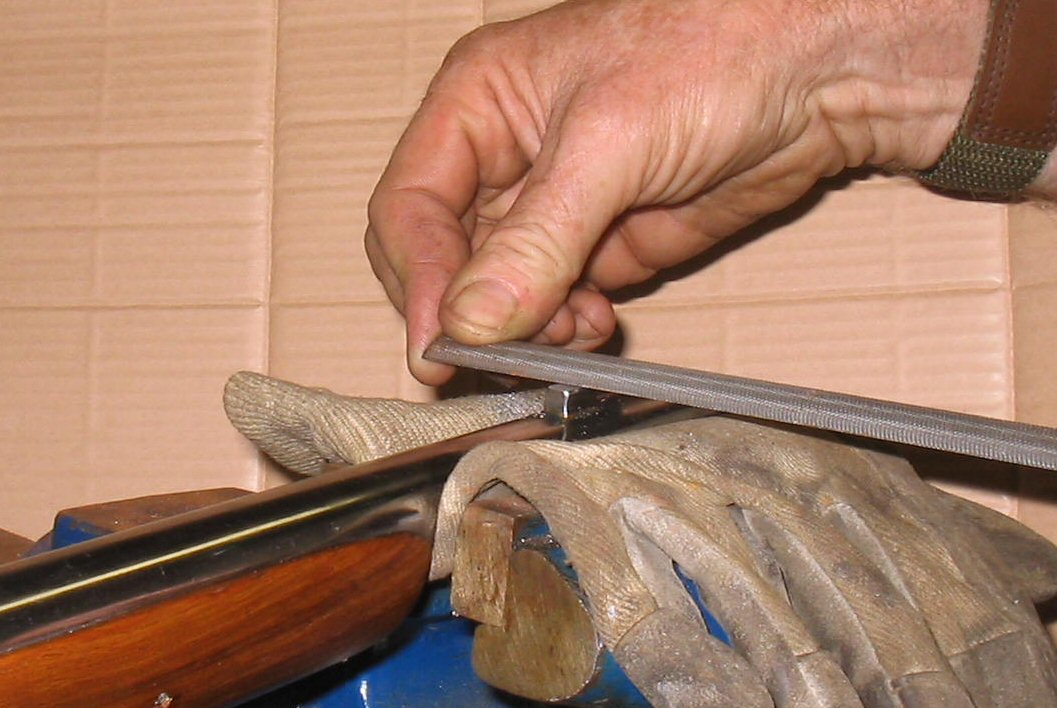
2nd step is to flatten the top of the bayonet lug. The lugs tend to be quite oversized, which makes them shoot low anyway. The lug should be flat on top and have square sides. Here, Jeff is the flat side of a half-round file to flatten and lower the top surface of the lug. |

|
| |
|
|
|
|
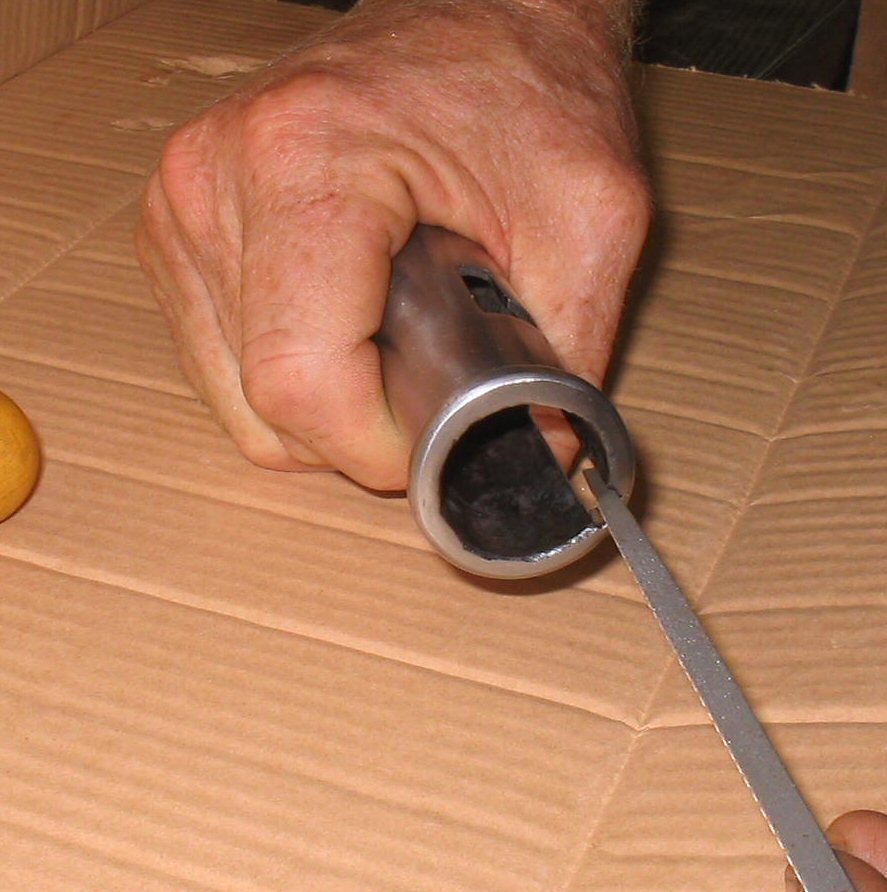
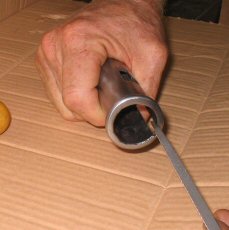
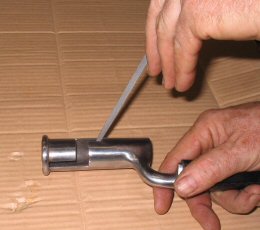
Third step Check the bayonet to see if it will go on over the lug. The slot in the reinforcing ring is probably too narrow. Here Jeff is using a small triangular file to open up the groove in the reinforcing ring until it is tall enough to allow the lug to pass under it.
|
|
| |
|
|
|
|
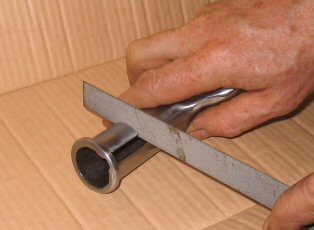
The fourth step is to widen the slot in the socket itself, if need be. Here Jeff is using the flat face of the half-round file to evenly widen the slot to allow the lug to pass through it. |
|
| |
|
|
|
|
Step five is to check and see if the 2nd slot is deep enough to allow the socket to twist over the lug. As you can see here, the lug on this gun is longer than the slot in the socket is wide. You can either file the lug or the socket, and in most instances it is quicker to file the socket. It also lessens the chances of scratching up your barrel. |
|
| |
|
|
|
|
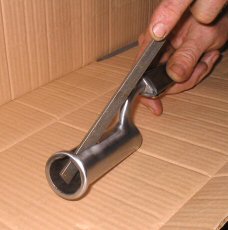
The sixth step is to deepen the 2nd slot to allow the lug to pass through it. Again Jeff is using the flat side of the half-round file to remove metal from the rear of the slot. |
|
| |
|
|
|
|
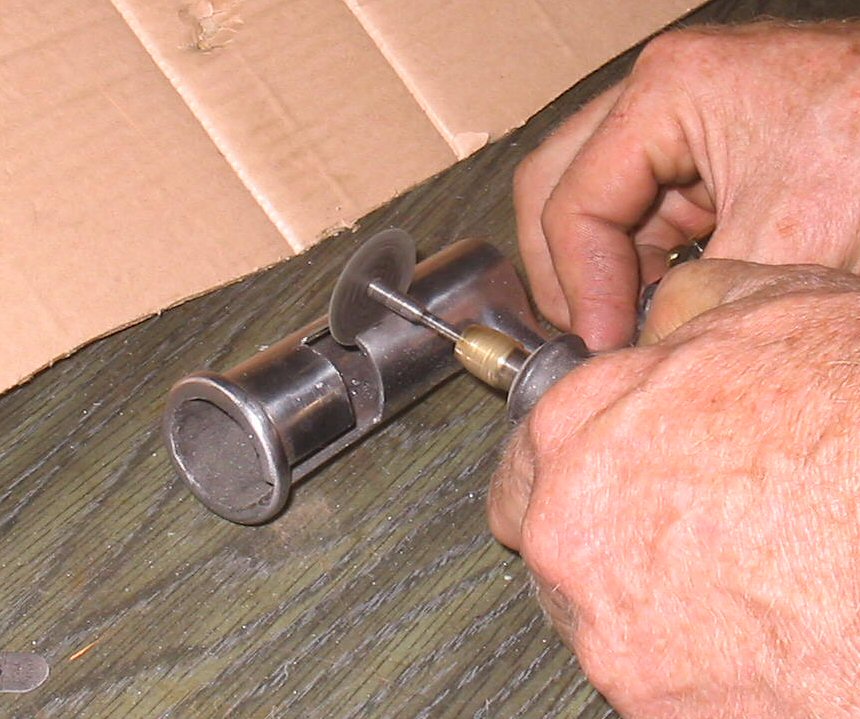
The seventh step is to fit the 3rd part of the slot to the lug if neccesary. In this photo, Jeff is tired of filing and is using a cutoff wheel in a Dremel tool clone to widen and extend the slot. You should be extra careful to not remove too much metal at this phase of the project, because a close fit of slot to lug here will lessen the tendency for the bayonet to rattle against the barrel. |

|
| |
|
|
|
|
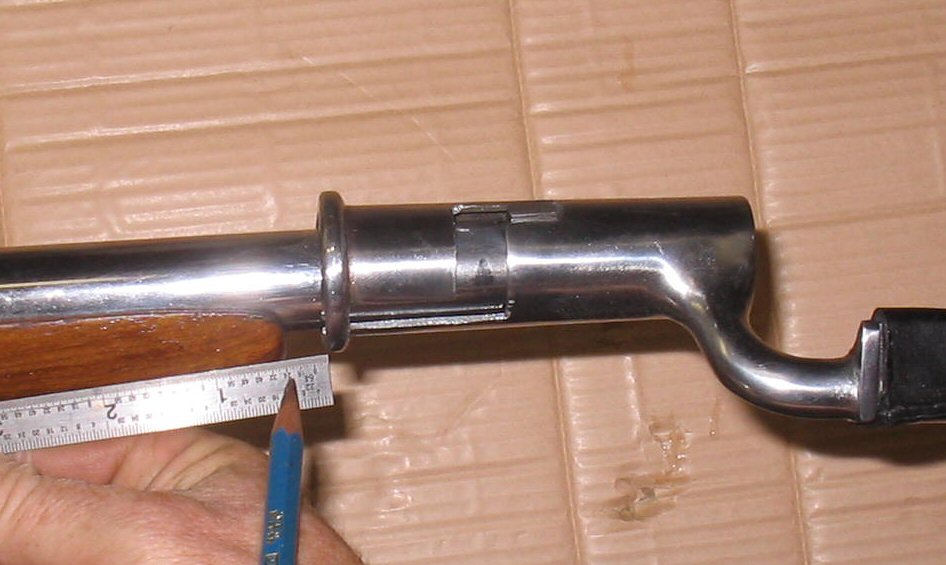
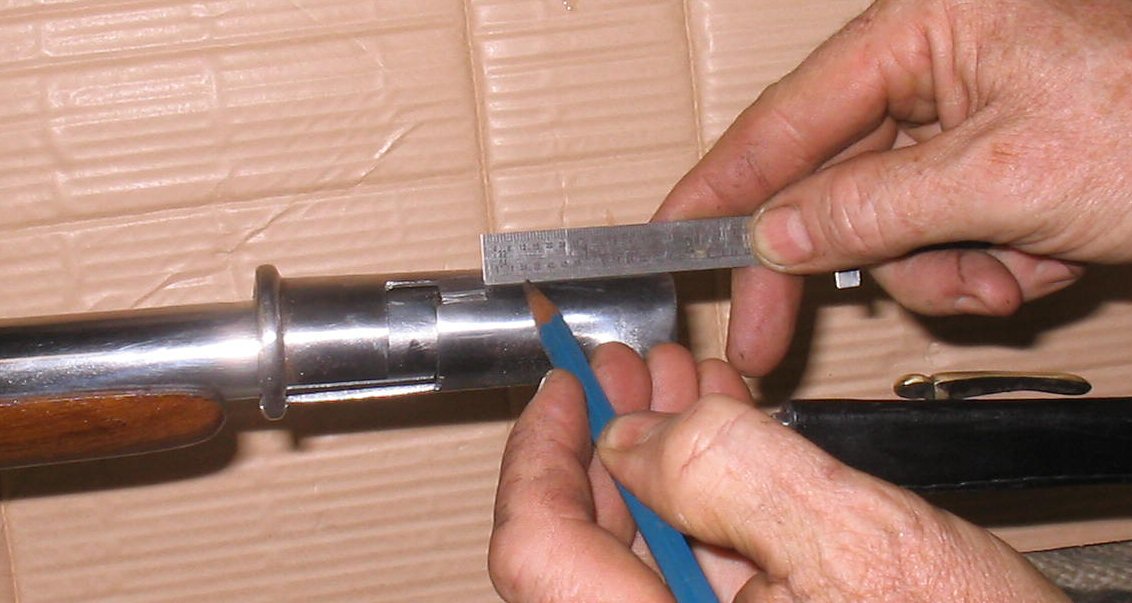
The eighth step is to take a look at where the bayonet is located when it is installed with the lug all the way into the slot. The reinforcing ring should sit right up against the brass nosecap, or in this case, the stock. When bayonetting someone (Actually bayonetting someone voids your warranty! Remember, fix bayonets only under the orders of your commanding officer in a pre-approved scenario!!!), this transfers the energy to the stock instead of all of the forces being borne by the joint of lug-to-barrel. Here Jeff is measuring the space between the back of the socket and the front of the stock. |

|
| |
|
|
|
|
The ninth step is to transfer the measurement taken in step eight to the socket to see how far the slot needs to be exteneded. You can make a mark with a scribe, a pencil etc. right on the socket. |

|
| |
|
|
|
|
The tenth step is to extend the 3rd segment of the slot all the way to the mark you made in the last step. You cna use the small square file, triangular file, or the Dremel. Again, here is a place to use care and not remove too much metal as a snug fit here cuts down on rattling. |
|
| |
|
|
|
|
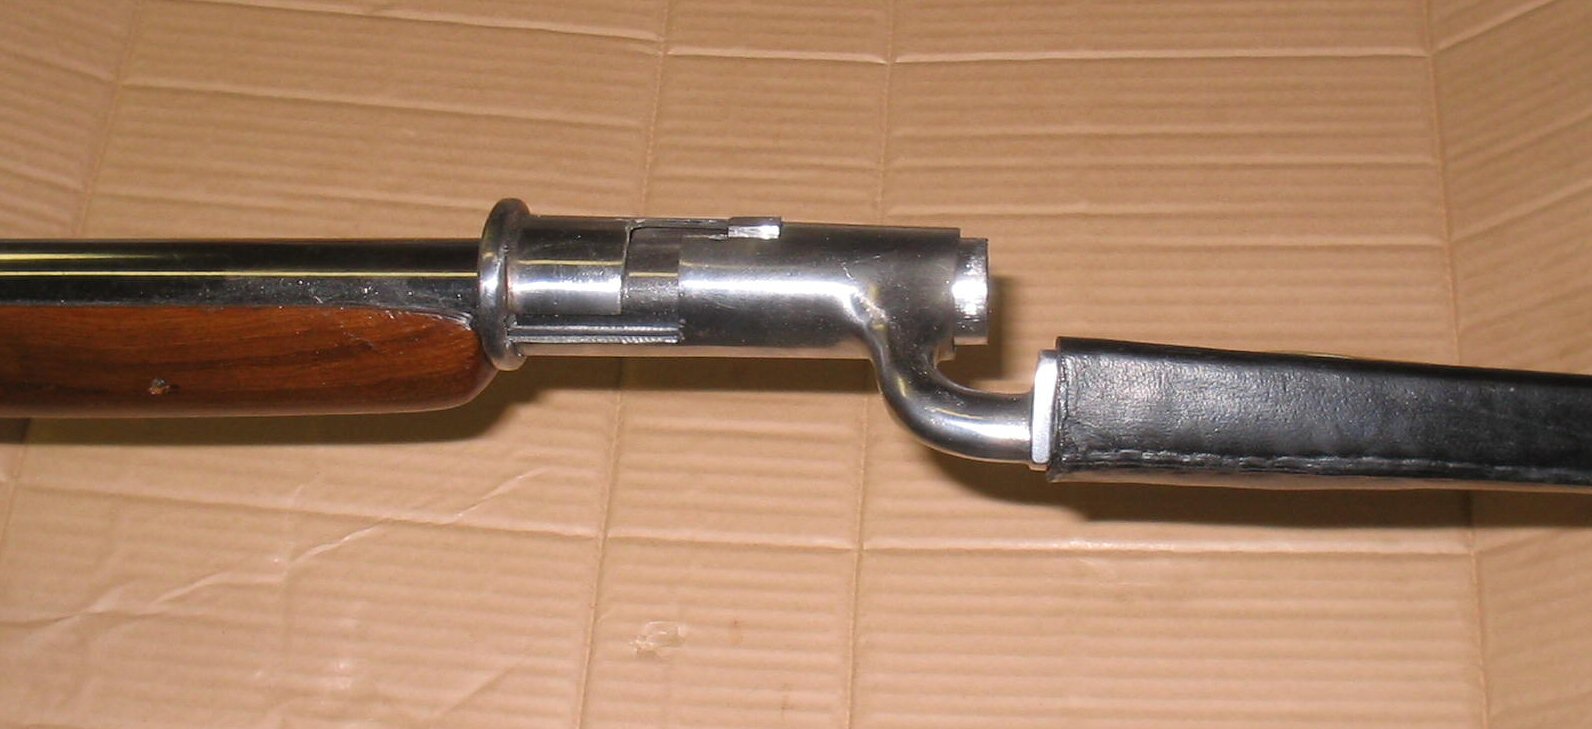
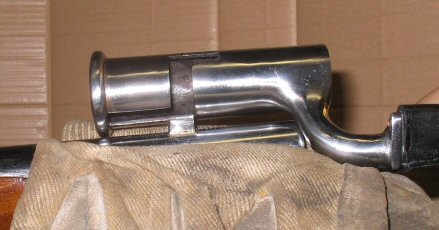
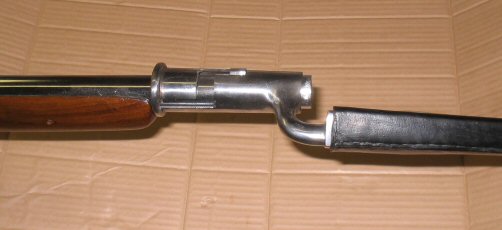
Here is the fitted bayonet mounted on the barrel, ready for action. Note that the base of the socket is touching the front of the stock.
|
|
| |
|
|
|
|
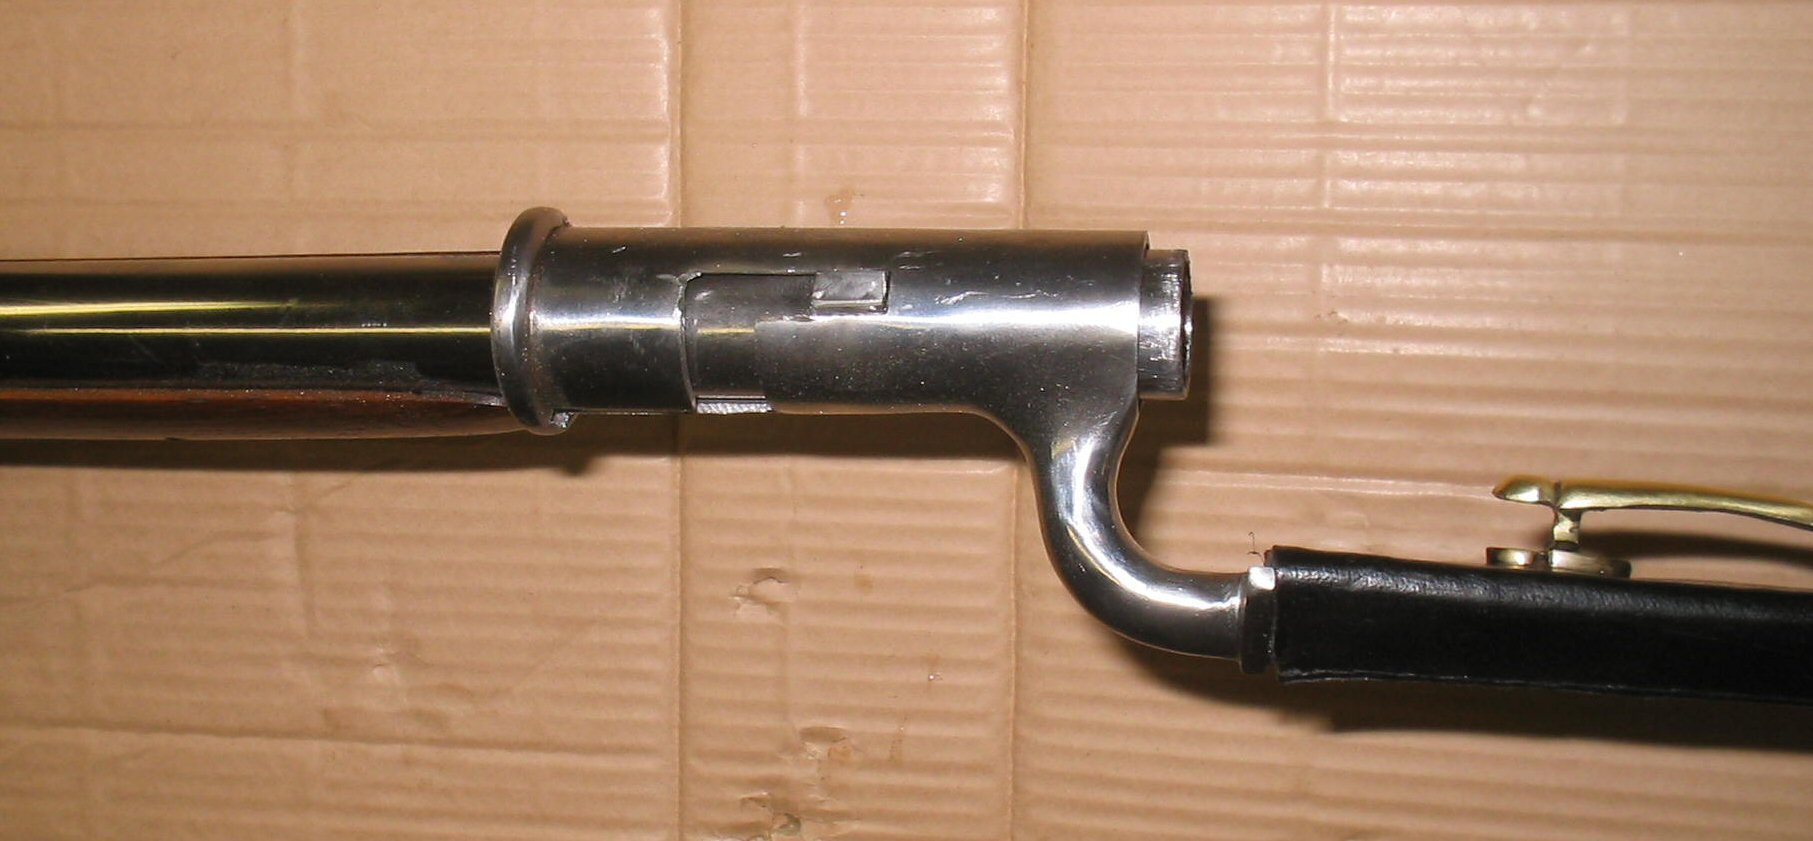
Here is another view of the mounted bayonet, showing the lug fitted to the slot. There are a few burrs and scratches to clean up with a file, but it is only a moments work at this point. Using a file, this project takes around 1/2 hour. Using a Dremel, it takes a few minutes. If your socket fits too loose on the barrel, give it a whack with a big hammer to make the socket's internal shape slightly out of round. This will constrict its size and make for a tighter fit. If you need to take that step, you will very likely need to widen the slot some more to allow for the new shape of the socket.
|

|
|